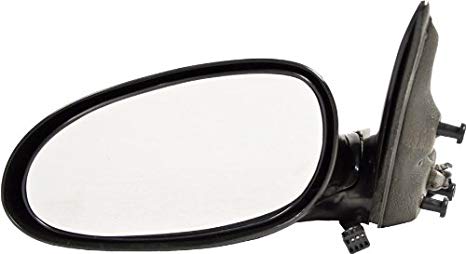
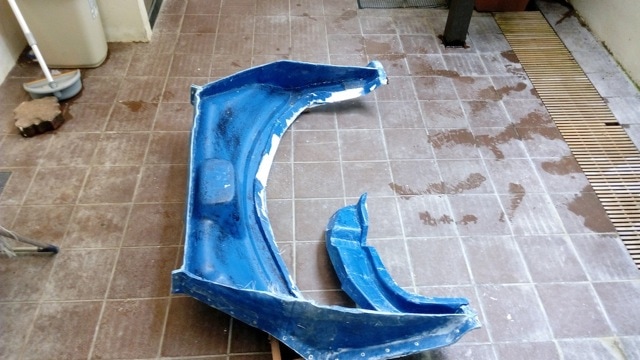
 I was asked recently what the mirrors on my car were off of. I then realized I had never added this part of my build to my blog, hence the post now.
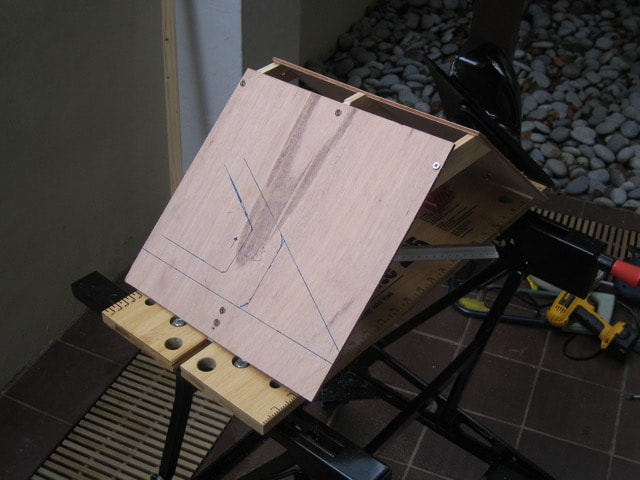
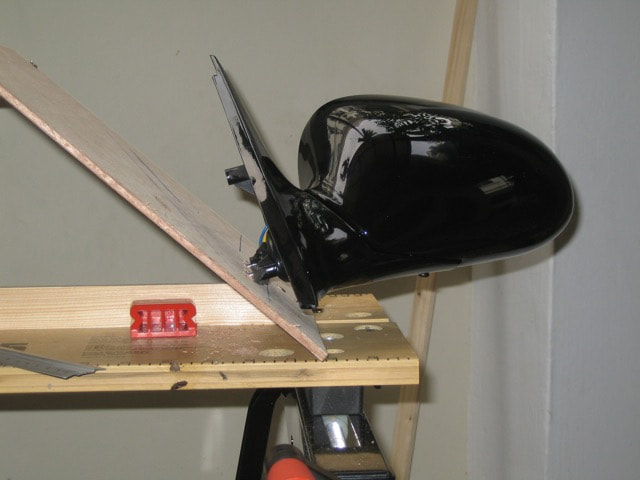
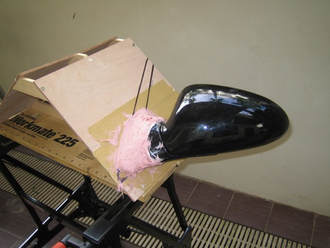
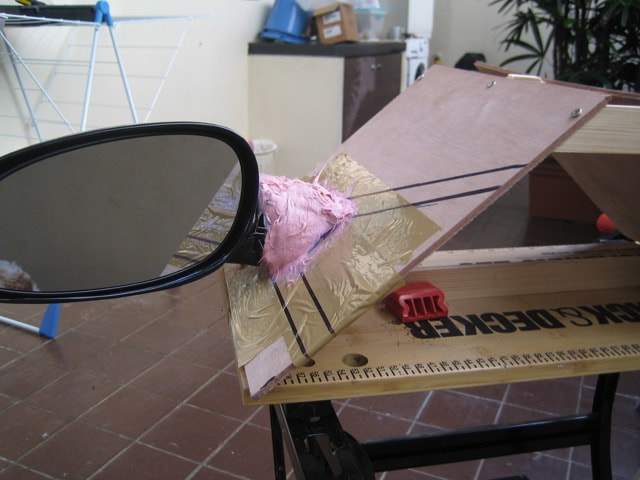
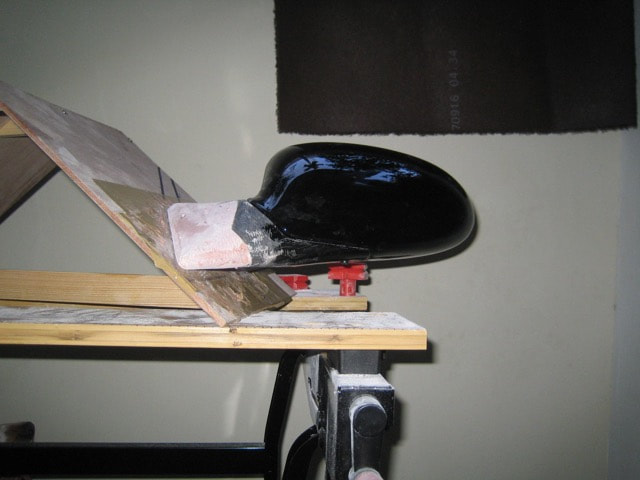
The next step was to start to shape the new fiberglass mount with a course rasp file to get it to match the lines of the window based on my drawings. Then next sandpaper to remove the score marks from the rasp.
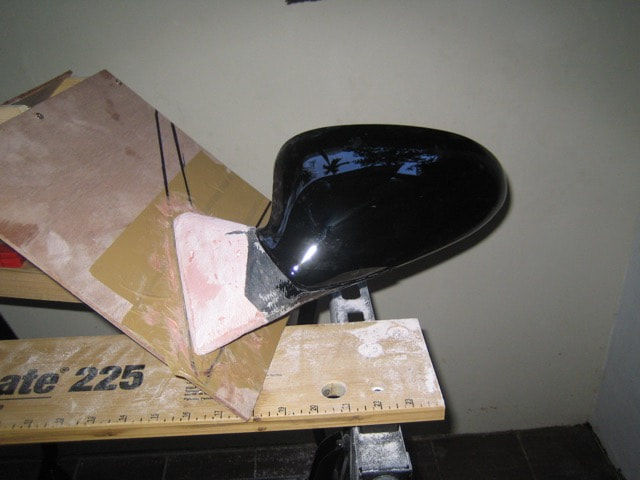
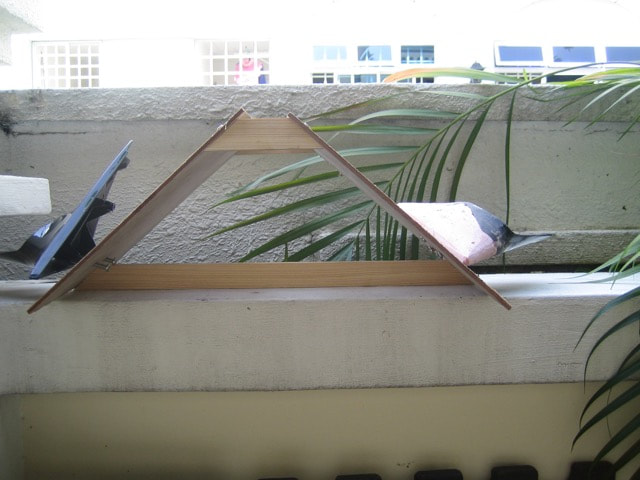
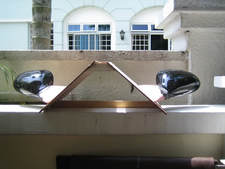
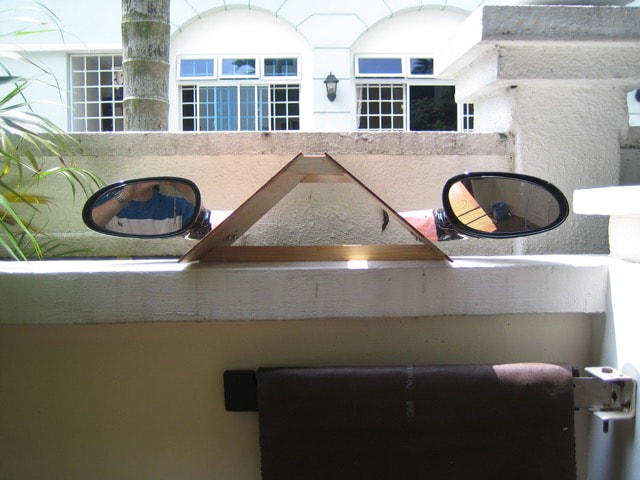
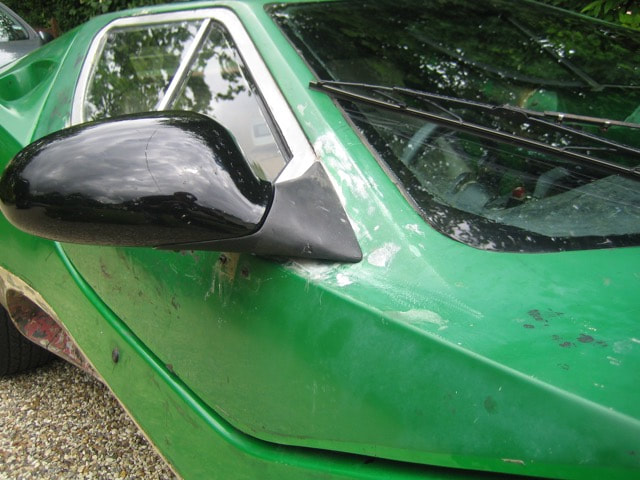
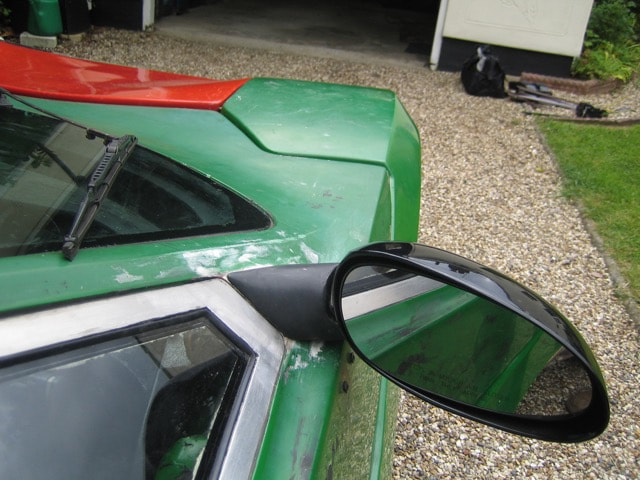
Once I got the mirrors back to the UK I could trial fit them to the car, thankfully they fitted perfectly first time with only some minor shaping of the underside to match the body contours.
Finally once painted to match the body colour they looked like they were made for the car. 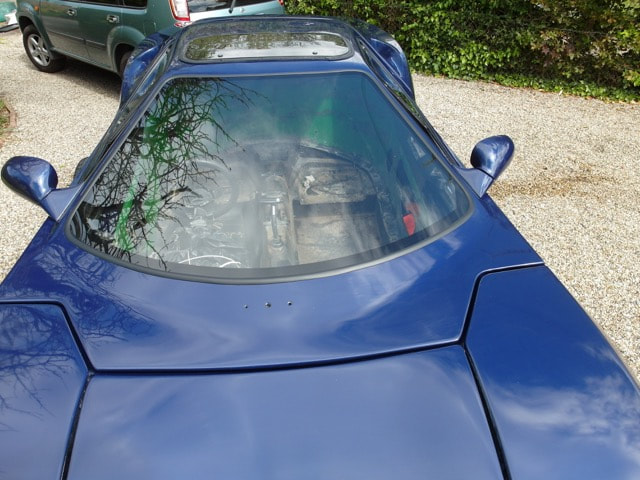
24 Comments
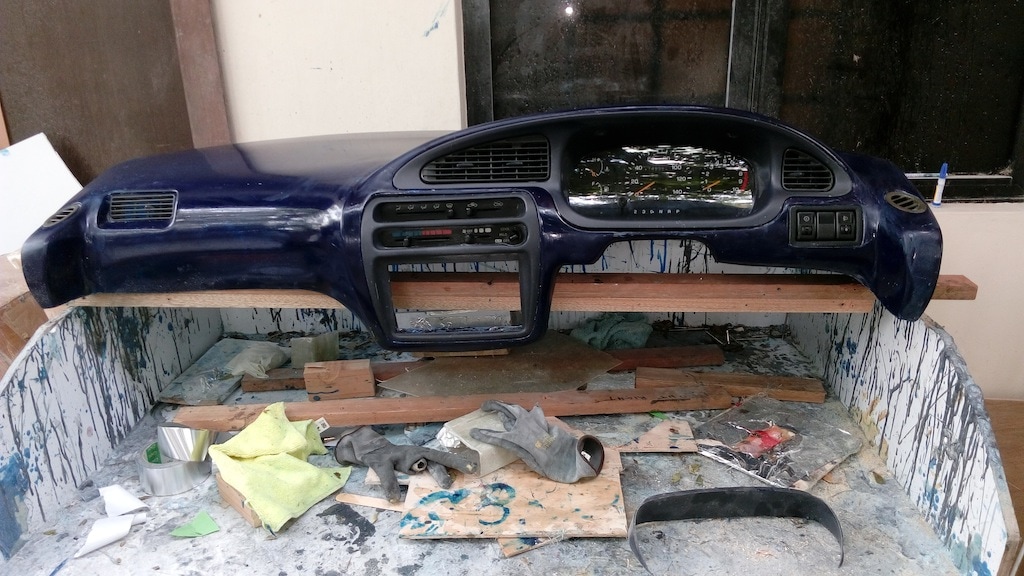
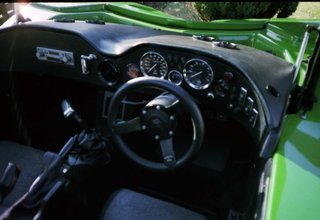
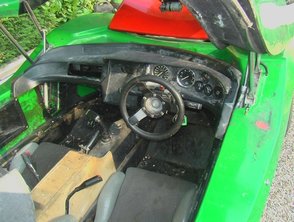
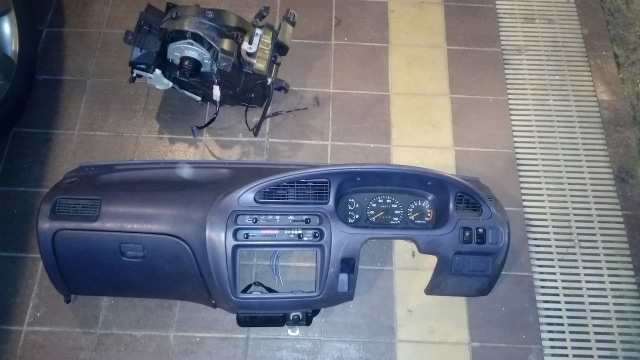
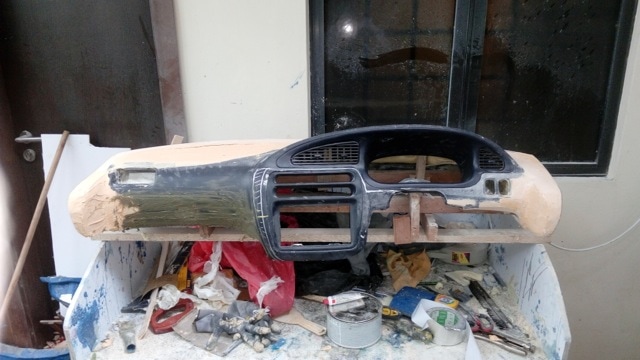
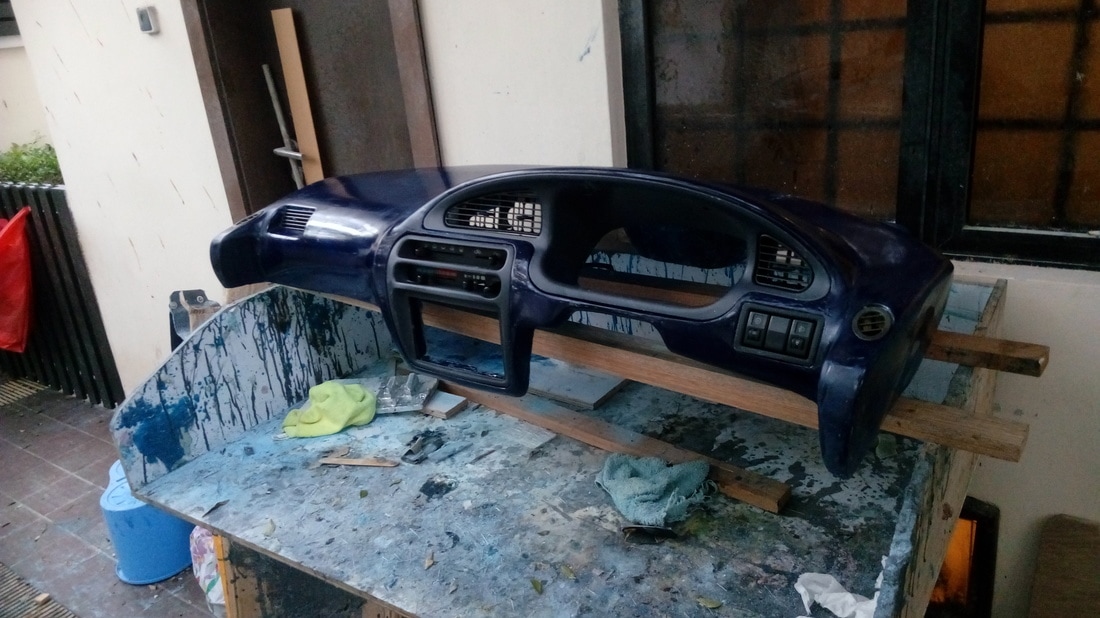
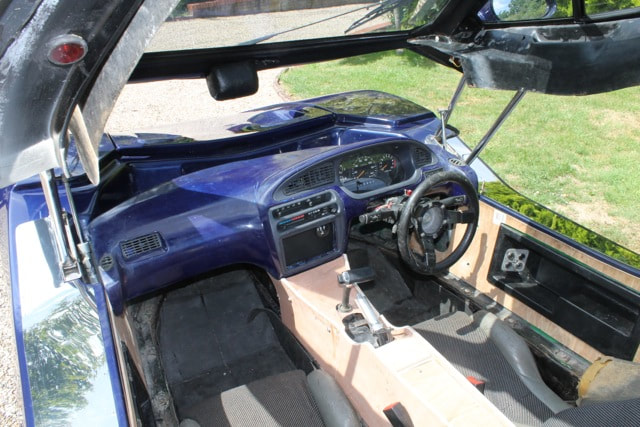
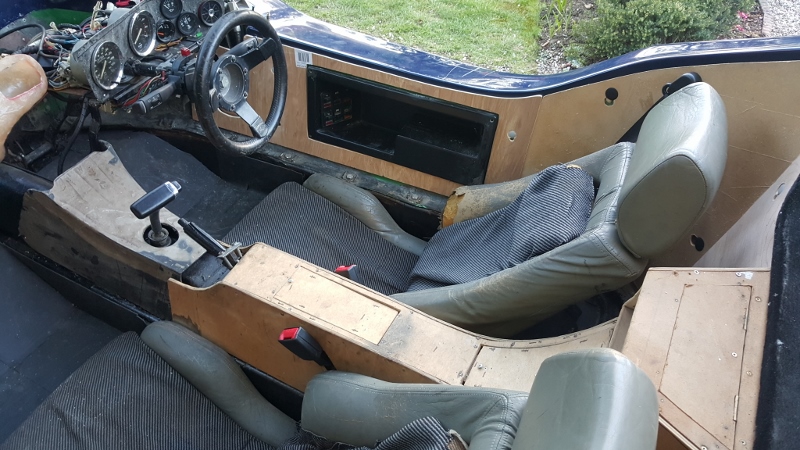
For years the dashboard has held up my build and finishing the interior. When I purchased my Nova it had the mark 2 “swoopy dash”, this was OK but I changed a few things about it and it was cut about to fit various switches and a glove box, then the opportunity came up to purchase a mark 4 dash, so I jumped on it. The mark 4 is a nice looking dash but as I soon found out it wasn’t really designed to have depth to allow you to hide heaters and aircon units beneath it. I tried on many occasions to adapt it, trying to fit face vents etc.. I knew this would take time so I shipped the mark 4 dash to Singapore thinking I would have more time to work on it here. For at least a year I did nothing, and then I made a plenum chamber for the HVAC as seen in earlier posts. However I was never really happy with the face vents, ducting and gauge layouts. So finally I bit the bullet and decided to build a dash myself having been inspired by a member of the Sterling Kit Car Forum’s work on his own dash.
Anyway, here is the process I went through : Step 1 : Take a mark 4 dash as the starting point to build the first mold so you ensure the back section of the new dash should fit and where the front of the steering column should be. Make the flanges and then lay the gel coat and fibreglass for each part of the mold (in this case a 5 part mold )
Step 2: Separate the mold from the buck and assess your work, figure out what you need to do differently next time.
Step 3: Lay the gel coat and fibreglass in your new mold
Step 4: Pull the part from the mold
Step 5: Acquire a donor dash to give you starting point for the new design, preferably one narrow enough that needs minimal cutting and reshaping.
Step 6: Cut the donor dash and blend with the rear section of a dash you know that fits the car (in my case the mark 4). This is achieved with expandable foam, filler and fibreglass. The process involved and awful lot of shaping and sanding which I hate.
Step 7: Dash surgery, hack the dash as necessary to move parts to the optimum position for a Nova. In my case moving the centre section to the left and reshaping the leg area to enable me to push the clutch pedal and have space for my knees (all this is in theory as I don’t have my car here to check the fit! So fingers and toes crossed on this one when I finally do a trial fit) 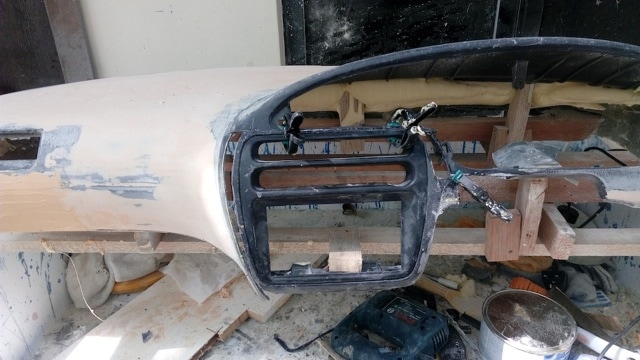 Step 8: Have the dash painted by a professional (i.e. not me) to get the best finish possible for the mold. I learnt from the first stage that the mold doesn’t miraculously look better than the part its taken from, so there are no short cuts here.
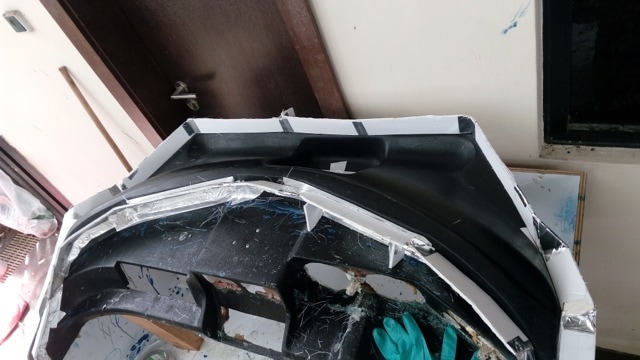
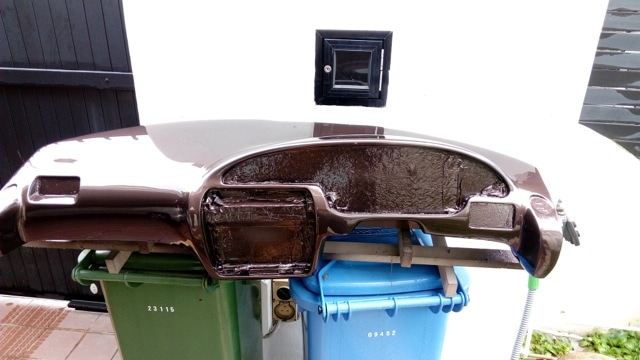
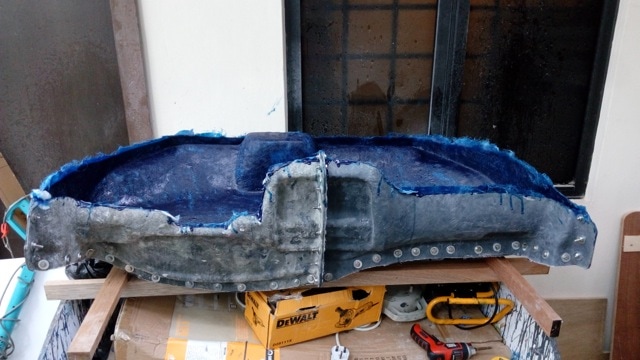
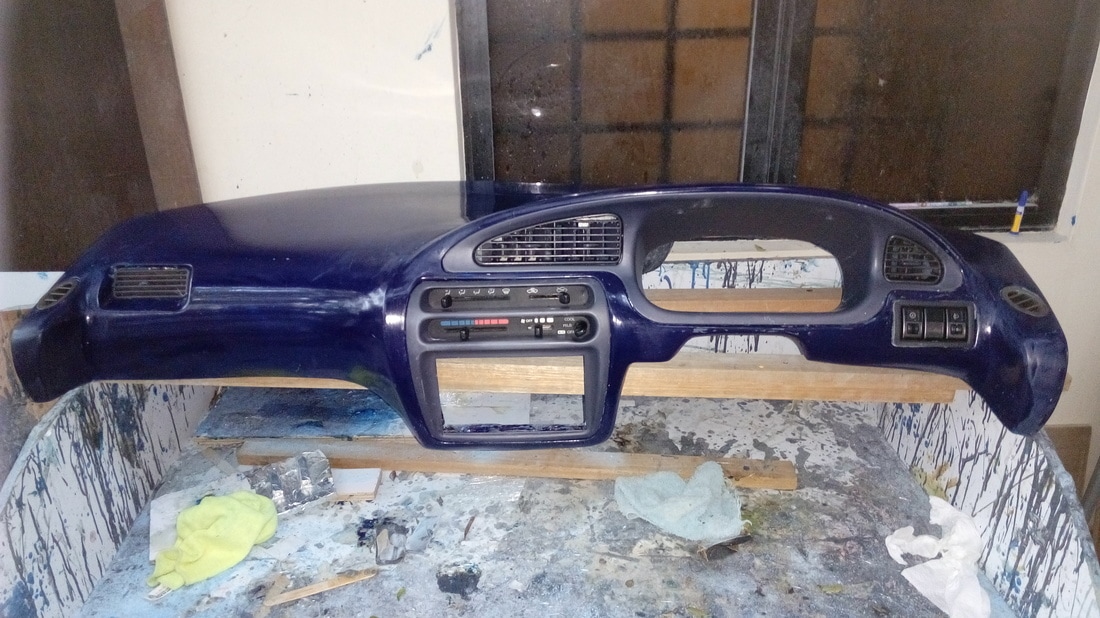
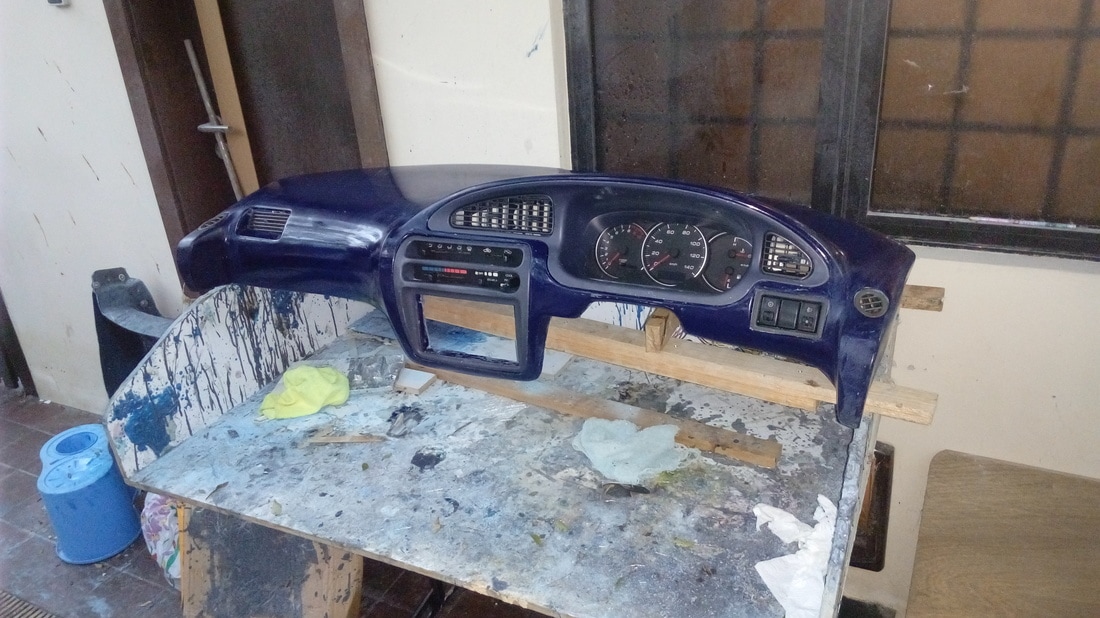
Step 9: Start making the final mold, again a multi part mold which in this case was 6 separate parts to ensure I could release the part from the mold.
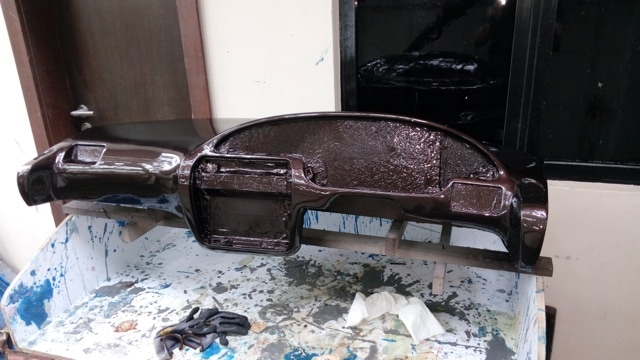
Step 10: Release the mold from the buck and fill any areas where the gel coat broke through. Several places needed filling in my case due to my poor fibreglass skills. These were filled with candle wax as the easiest fix as it was a onetime mold. In my case the buck didn’t survive so well when the mold was pulled, not enough PVA. 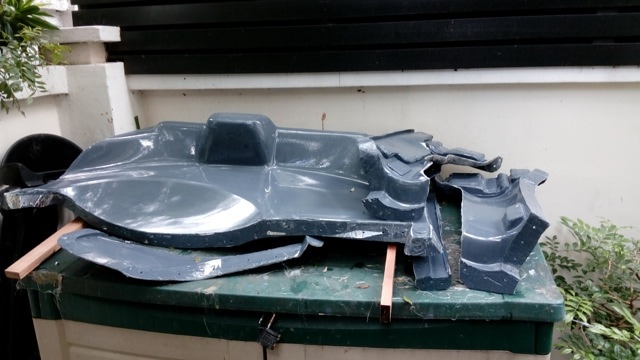 Step 11: Prepare the new mold (bolt together, candle wax on the join lines, Release Wax and PVA) and start laying the Gel Coat and fibreglass layers
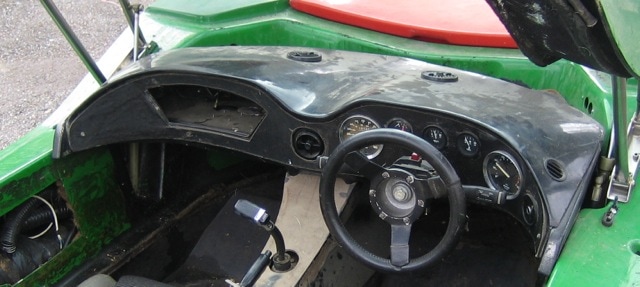
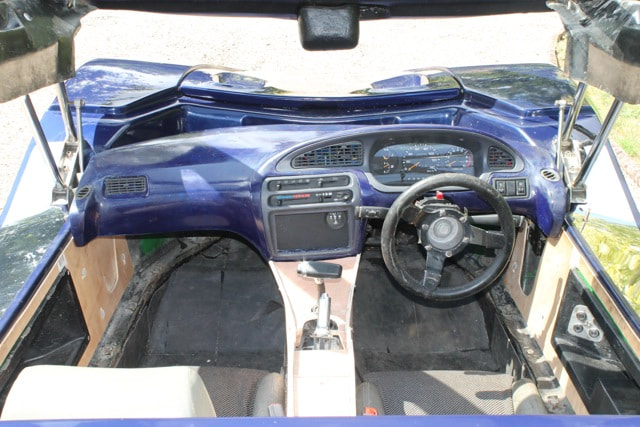
Step 12: Pop the final dash from the mold and cross your fingers it releases and is in reasonable shape. 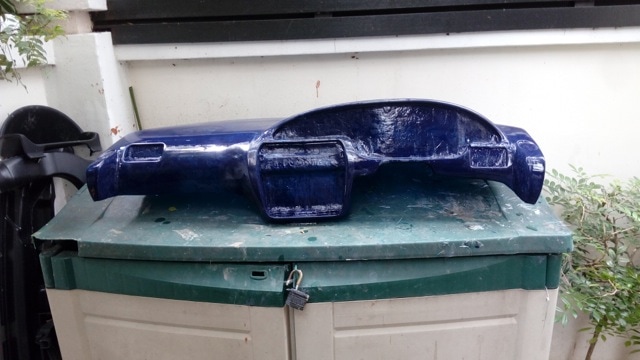 Step 13: Sand off the mold flash lines from the part and cut out the blanking panels being careful to retain the sections required for the OEM inserts to plug into. Hey Presto after many months of work and hundreds of man hours the new dash is ready for transportation to the UK and if it fits then covering in Alcantara cloth.
 And the proof of the pudding as they say....."It Fitted!"
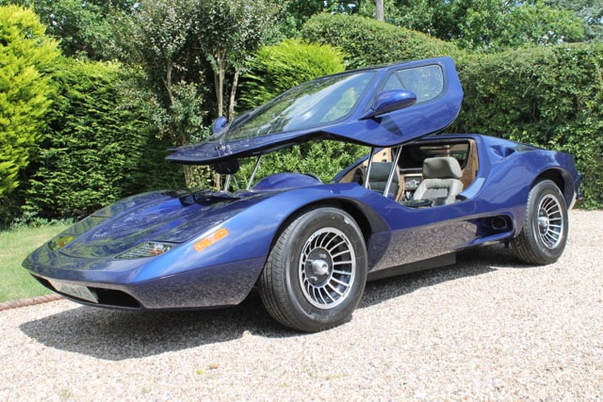
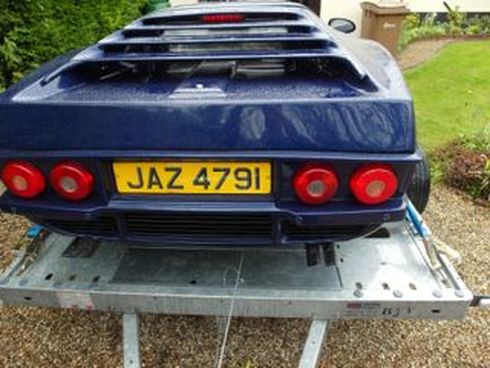
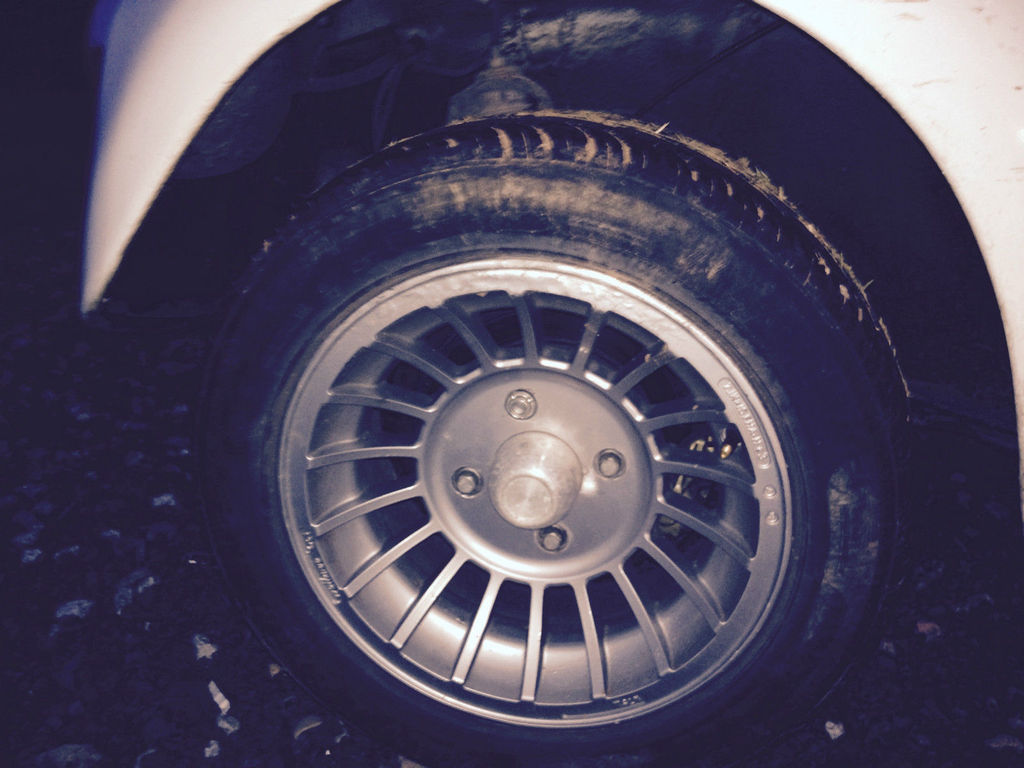
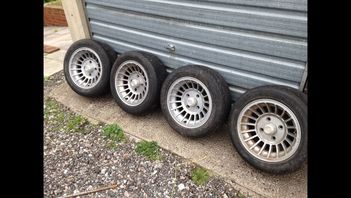
My Nova has had "Slot Mag" style wheels on it for the last 26 years, they are 14 inch rims. Its getting harder and harder to find 14" tyres with the right profile for the Nova, plus the wheel arches could do with being filled out more. So when an opportunity to buy some 15" Wolfrace Turbovec wheels on eBay came up that had the right size wheel stud pattern I jumped on it. They were in reasonable condition although one wheel had some corrosion and curb damage on the rim.
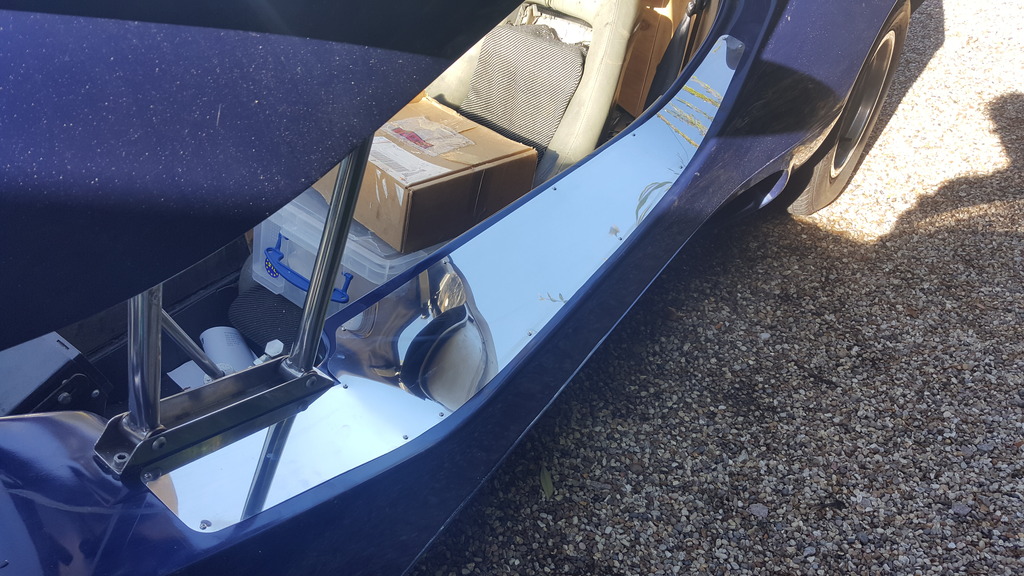
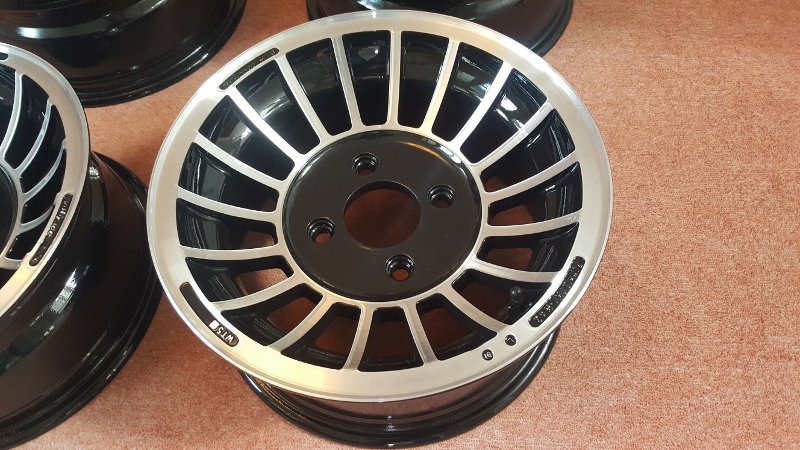
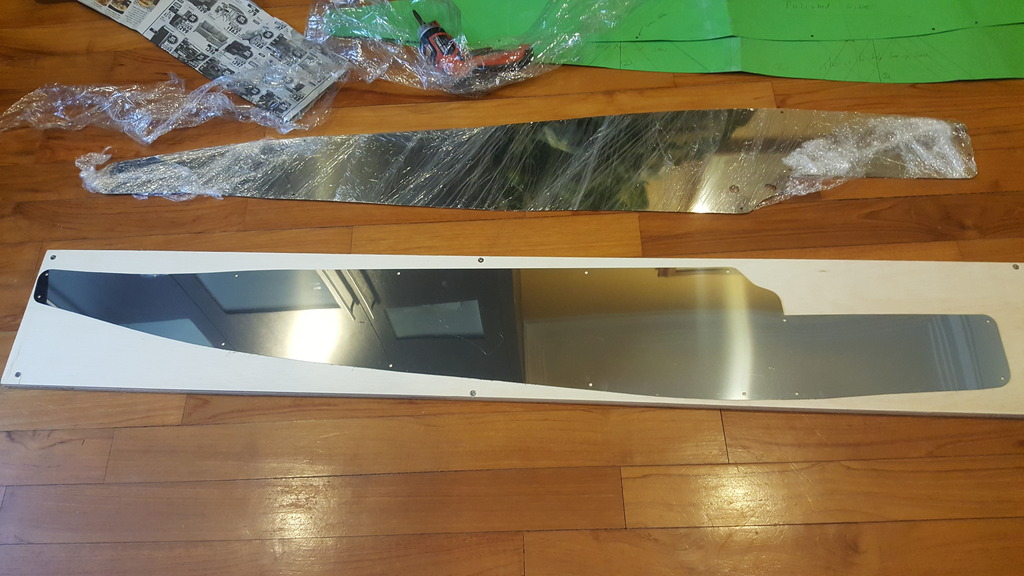
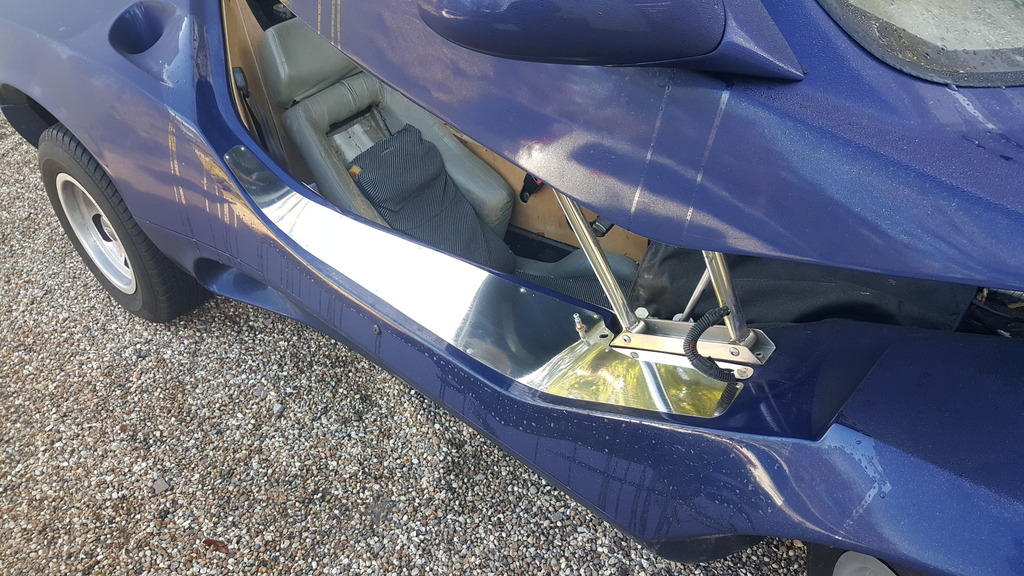
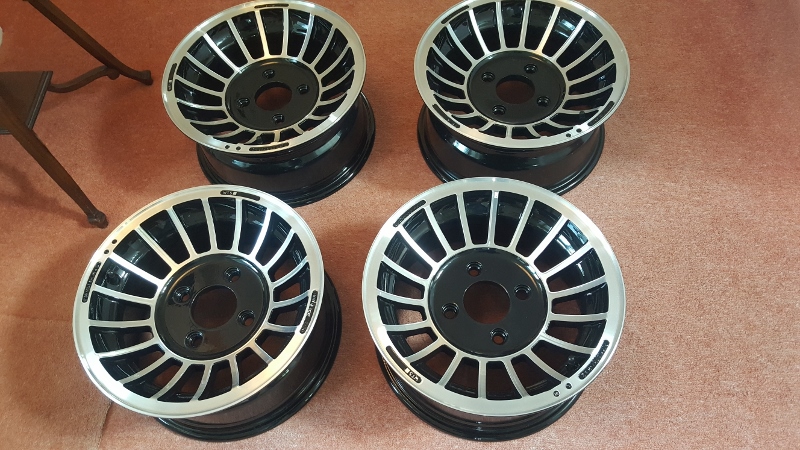 I chose to go for high profile tyres (215 R15 / 70) as the rims were still small compared to today's standards and I wanted to fill out the wheel arches of the Nova body as much as possible The before Look.....with Wolfrace Slot Mags  The look after with the new Turbovecs . It fills out the arches better 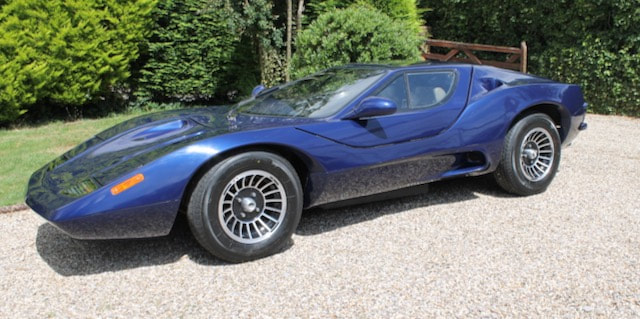 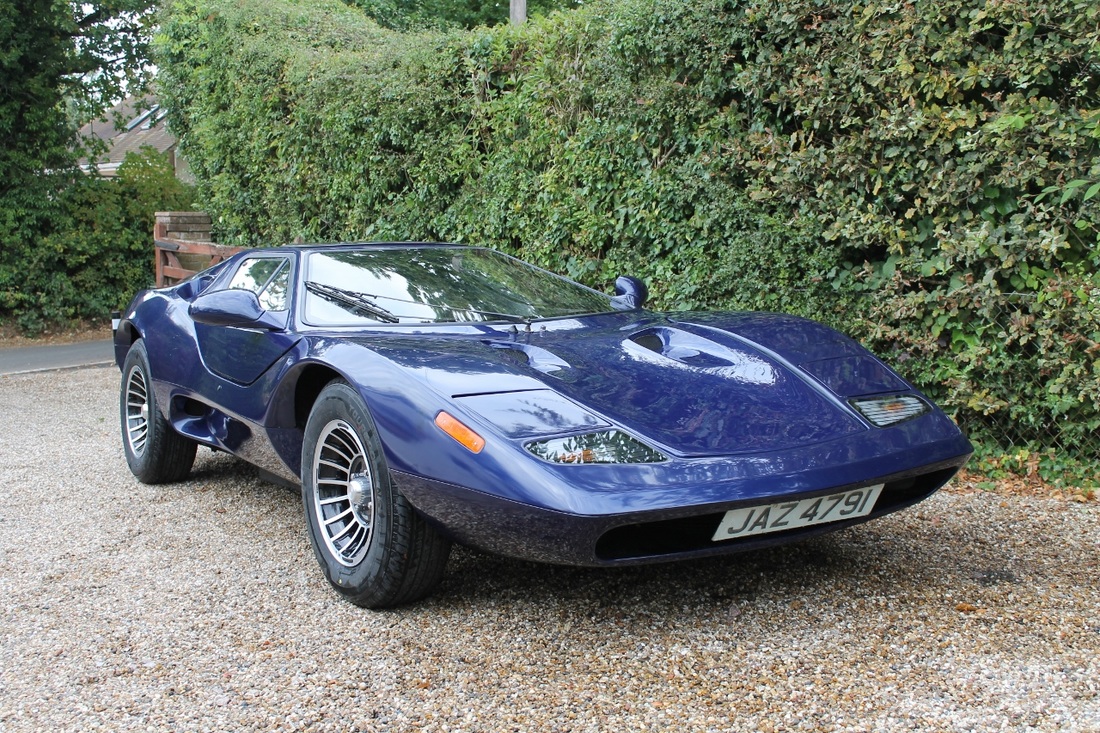 I wanted to make up some metal plates to protect the side sill part of the body when people get in and out of the car as they have to slide over the cars edge to do so. So I made up some templates out of card then transferred them to a CAD image by scanning them and converting them to vector files. Like so many other things on the car they are asymmetrical so it was two separate files.
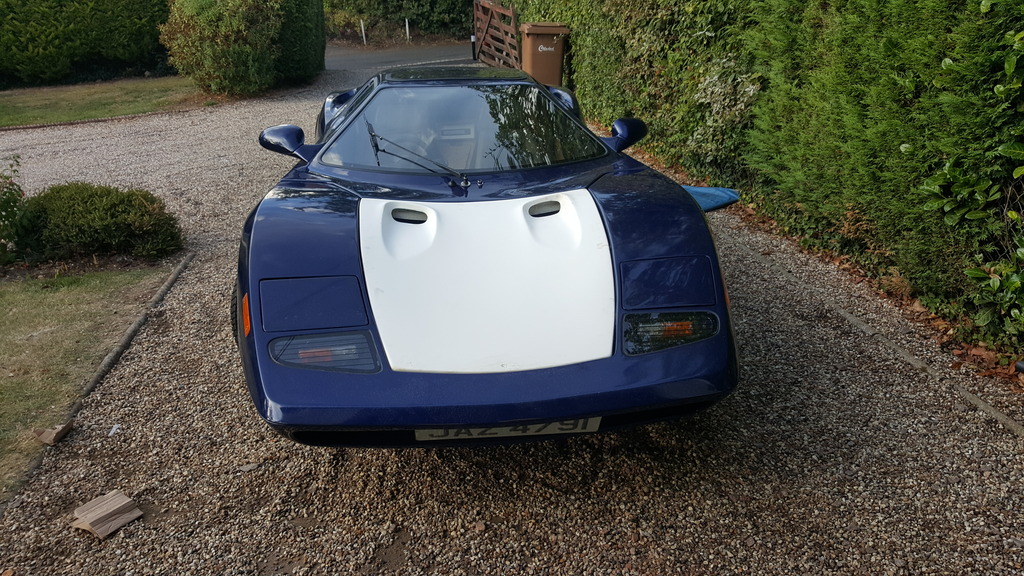
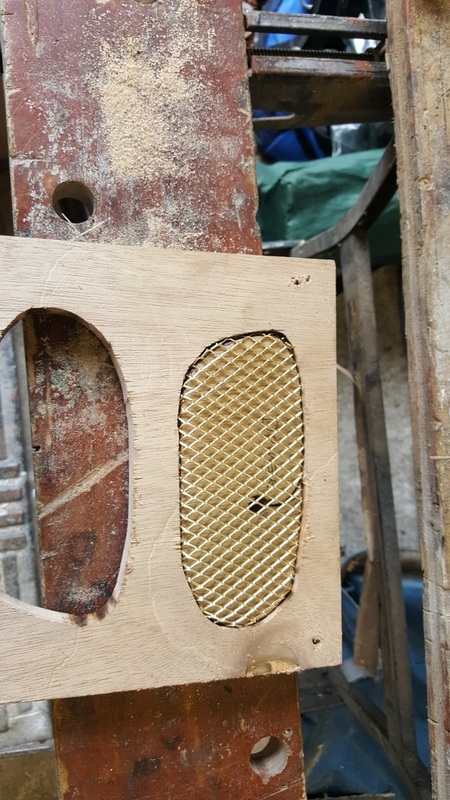
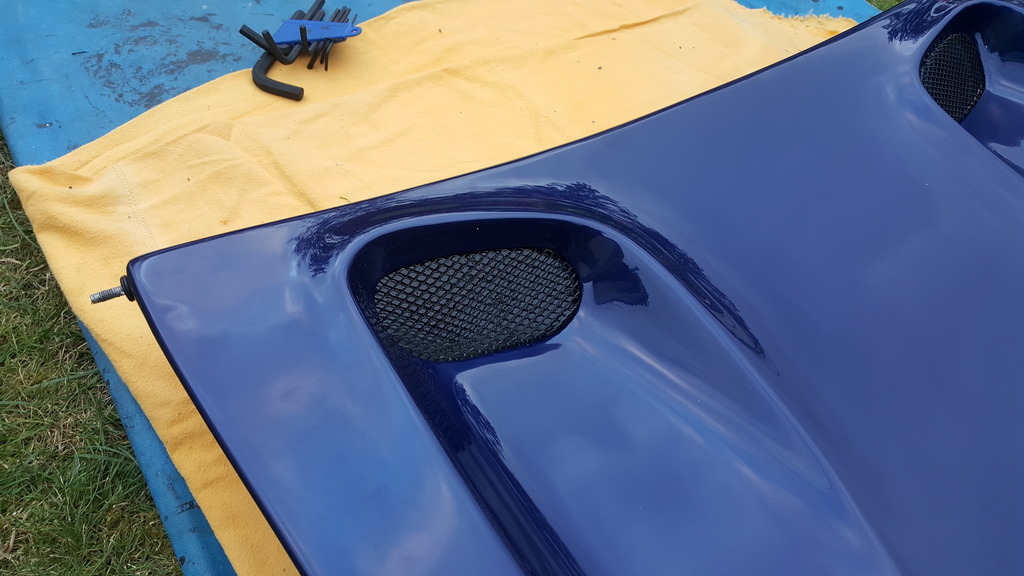
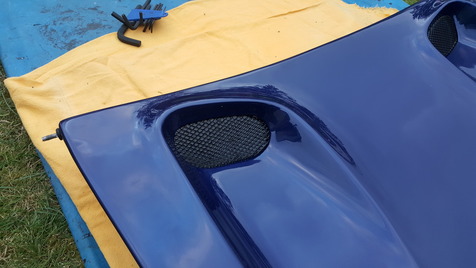
 I decided that the Nova needed to breath more easily, so I gave it its nostrils back. I changed to the smooth bonnet design (known as the Mark II) on a whim some 20 years ago. I always knew that one day I would revert back. 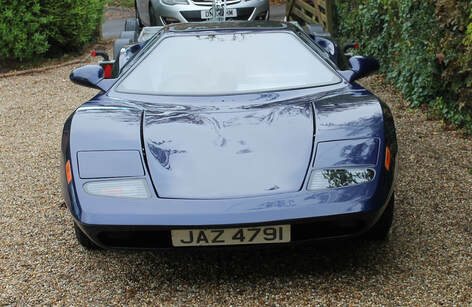 The mark 2 bonnet that I changed to and regretted
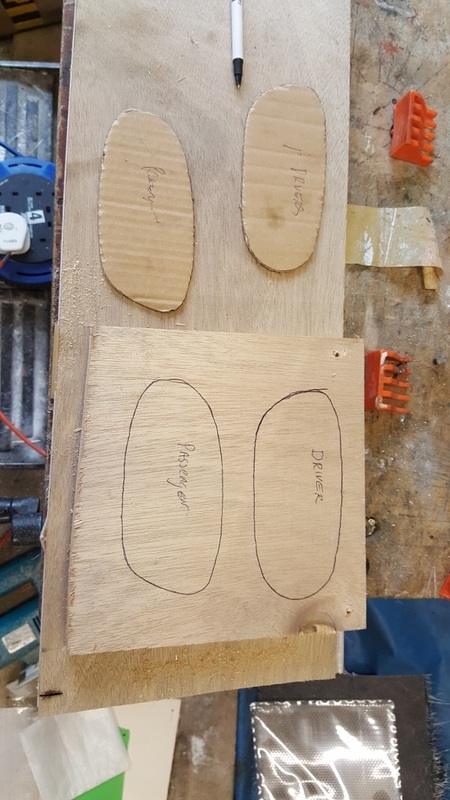
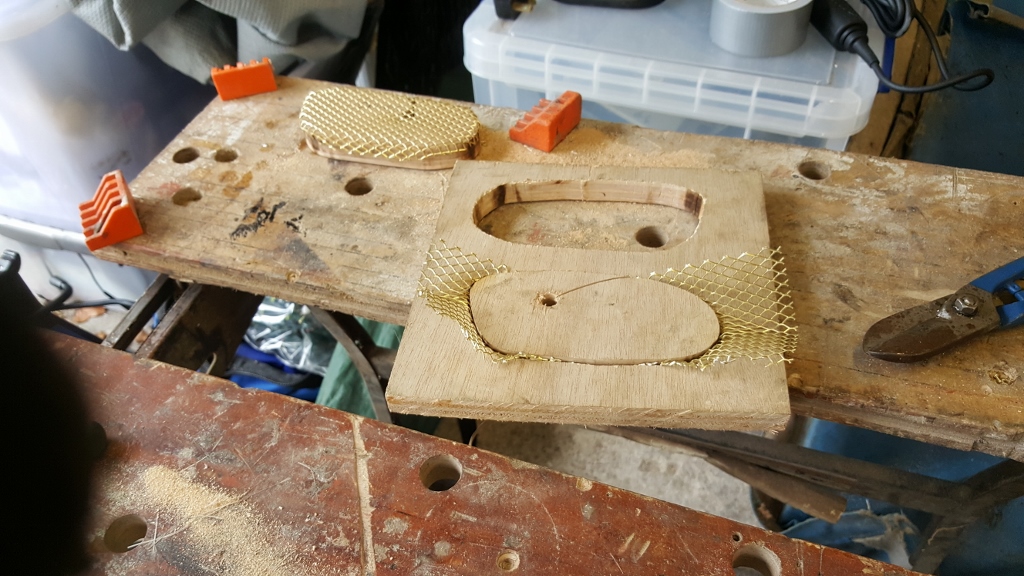
Making up the slightly embossed mesh grills to fit into the bonnet's nostril opening
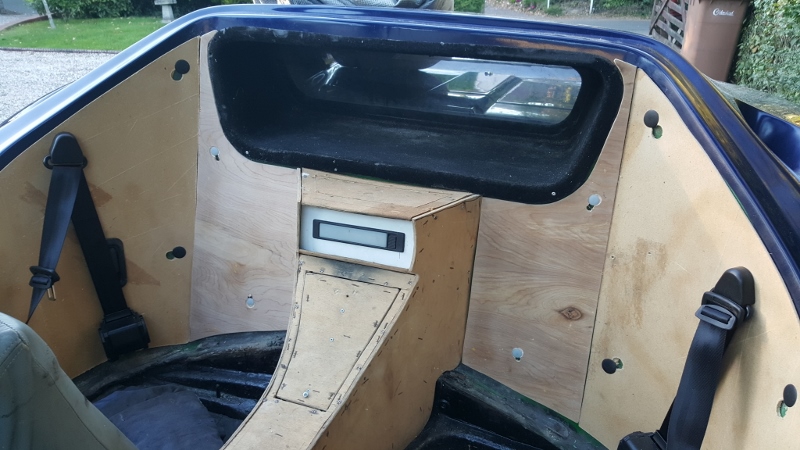
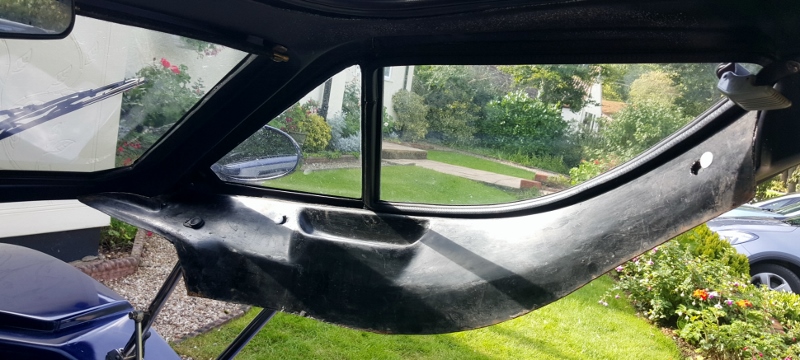
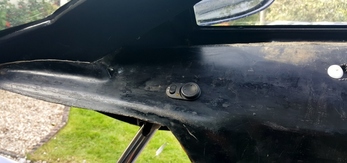
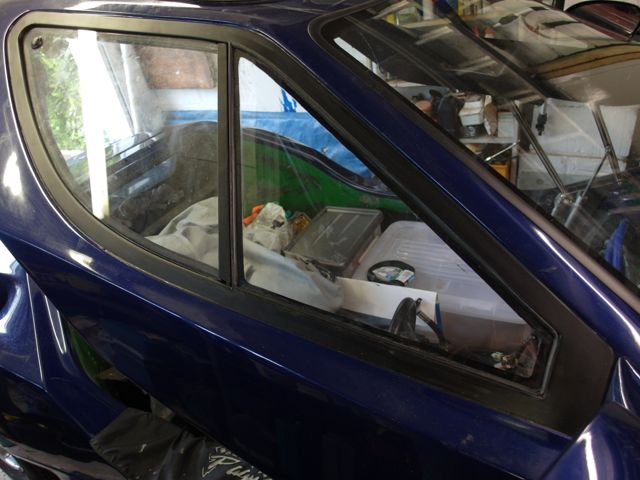
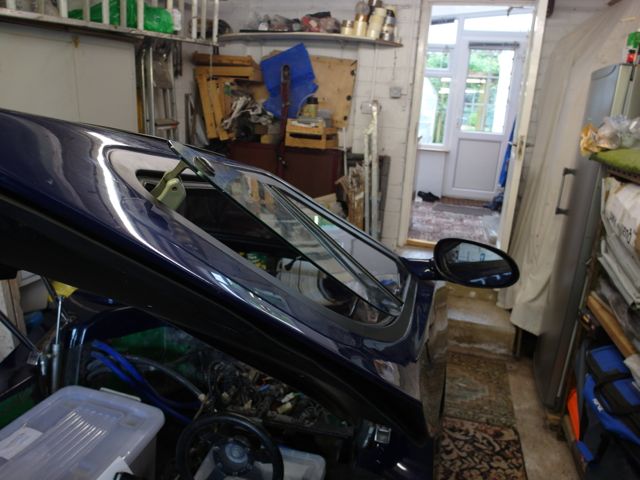
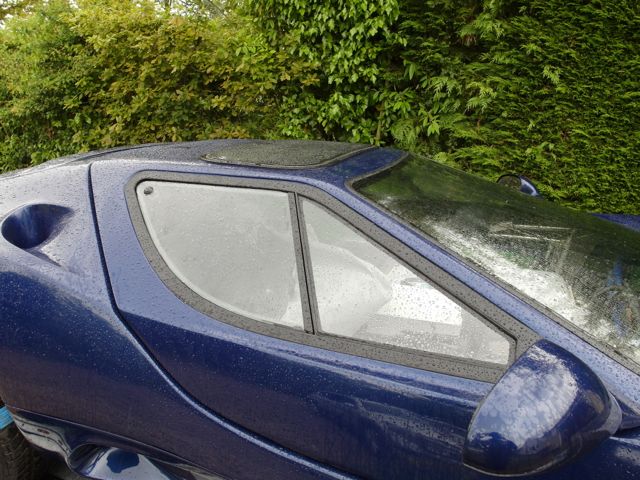
The final look with the new bonnet fitted  I started by fitting the trim panels to cover the canopy sides, and added and wired up my wing mirror switch (thanks to Alex for solving my wiring dilemma)
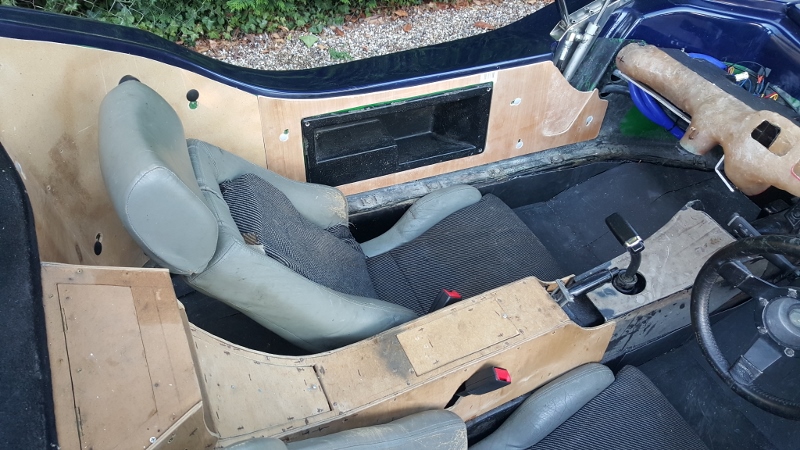
Next I set about making card panel templates and then transferring them to plywood. 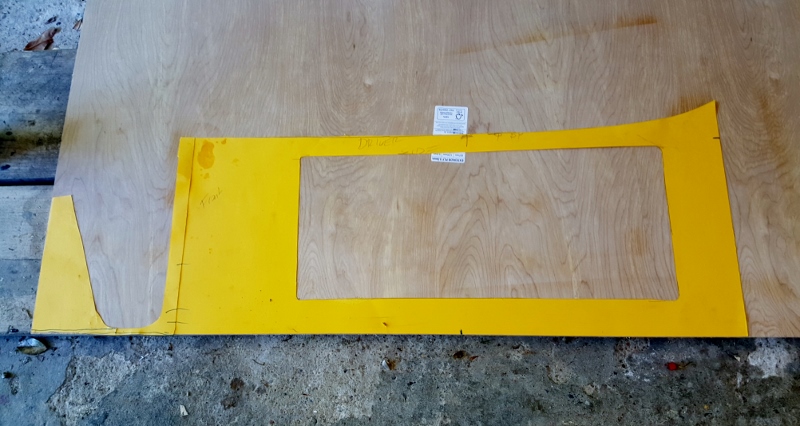
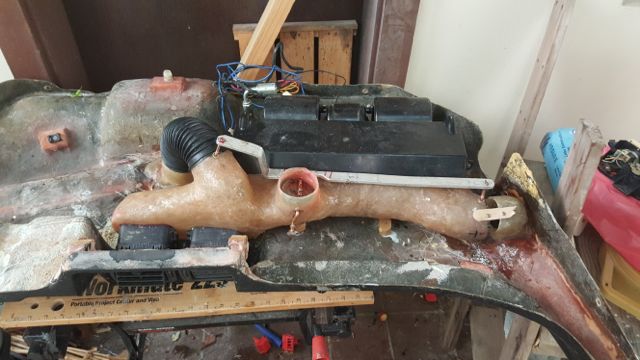
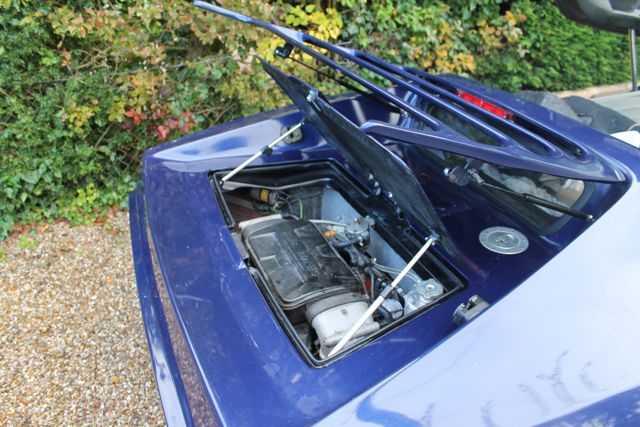
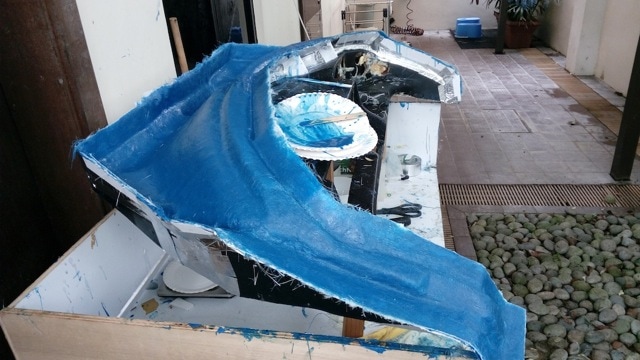
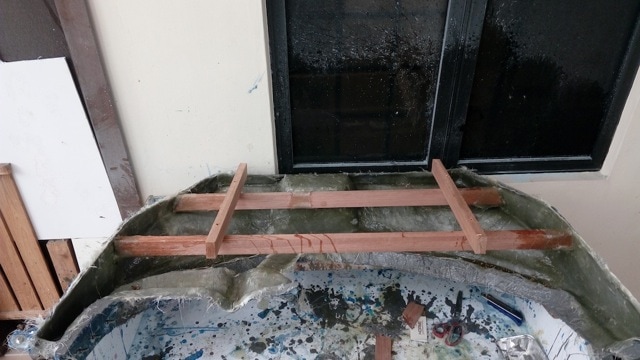
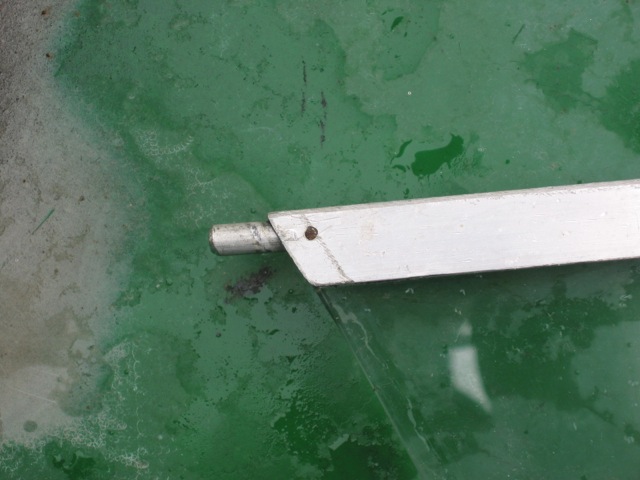
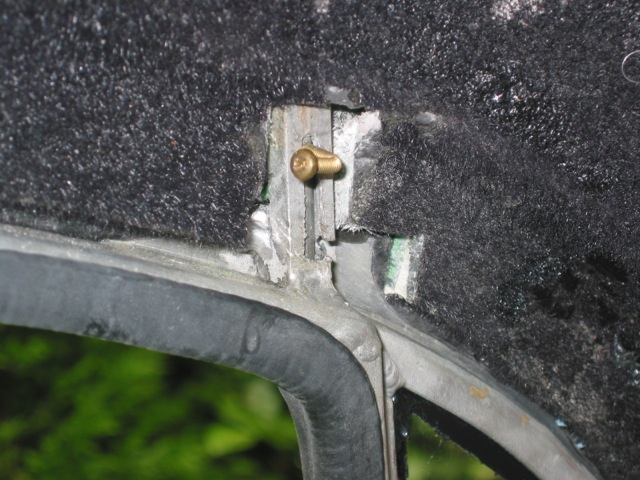
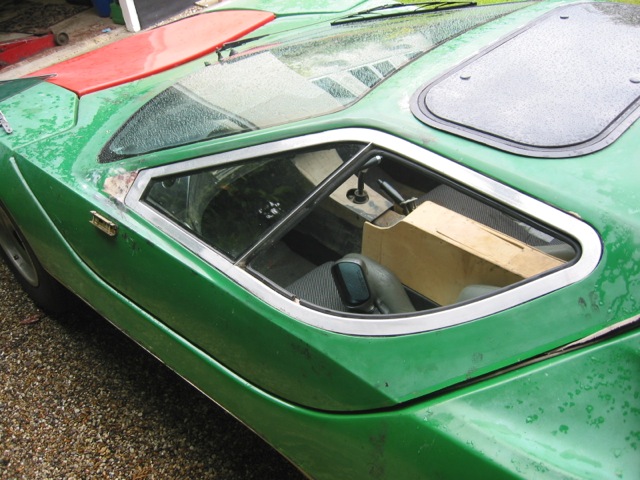
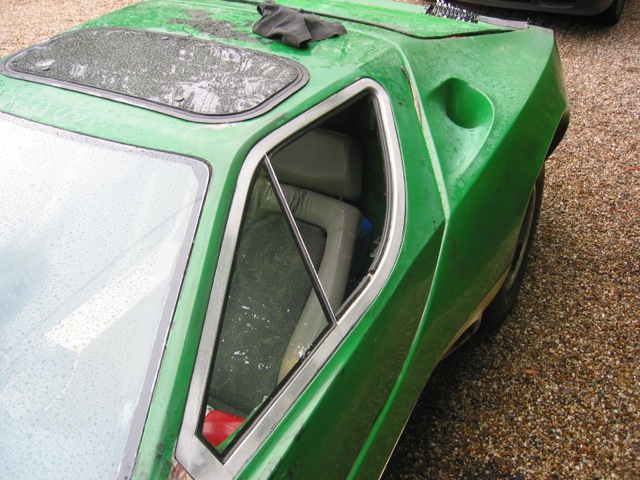
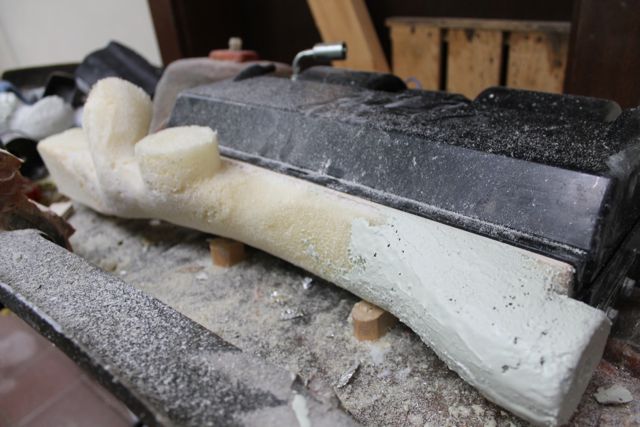
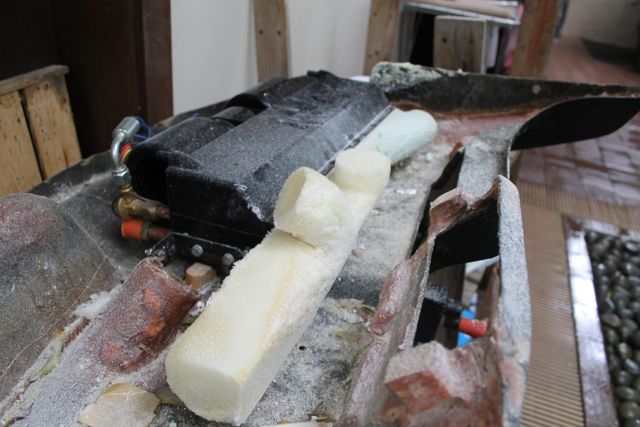
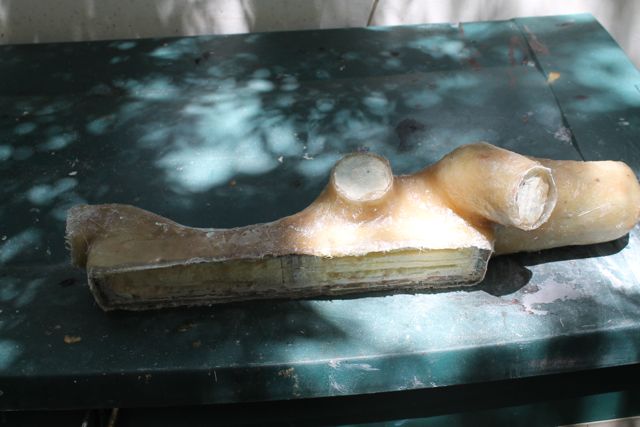
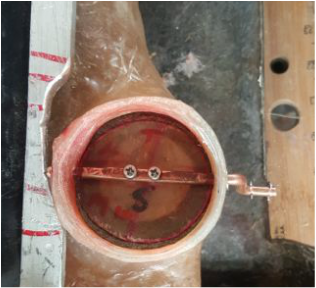
 I had an aluminum frame made up to fit into the window opening. This allowed me to bond in the front glass and make the rear section removable by using a sliding pin built into the frame. My aircon / heaters plenum chamber that came with it had the outlets in the wrong places for my air ducting. Furthermore the close proximity of the central vents meant that bending ducting around would have meant the angles were too tight and possibly compromise the airflow and I wanted lots of airflow to the 2 central air vents. So having been inspired by Brett Proctors work on the sterling site using PU foam to form bucks I thought I would have a go. I used 2 part PU foam to expand to the basic shape and then carved / sanded it to the shape I wanted. I then used normal car body filler to cover the foam once I was happy with it. In this shot I have started to put body filler on one end even though I was still shaping the other end (basically experimenting). Oh yeah, the shots are with the dashboard upside down, with little blocks of wood that are supposed to position the heater / aircon unit where it would be once mounted in the car......and if I got that bit wrong then I'm going to have a lot of rework to do later!
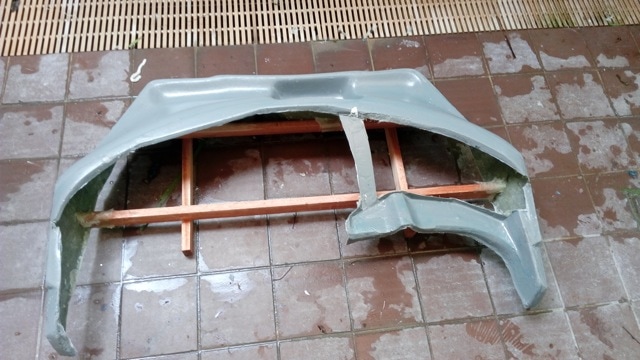
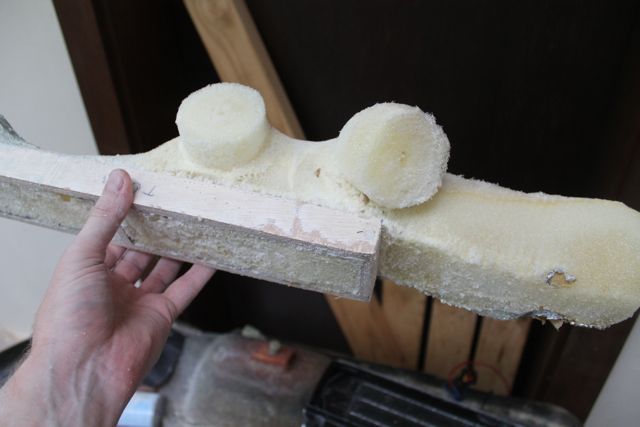
I made a wooden frame for the front section that mounts inside the heater to ensure it fitted correctly once glassed over. Once all the shaping was done I added 2 mm thick baton to this front edge to match the aperture exactly, so that once it had fiber glass laid over it, it would tightly slip over the outer edge of the heater outlet and form a good seal.
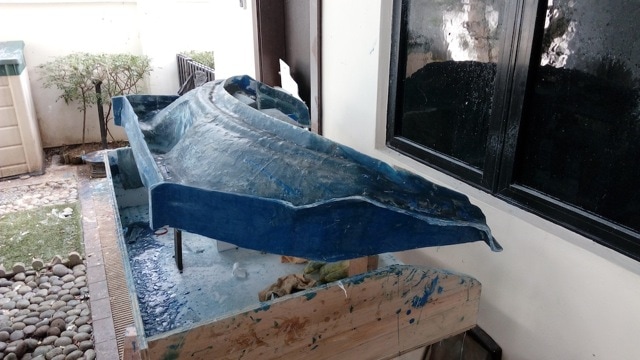
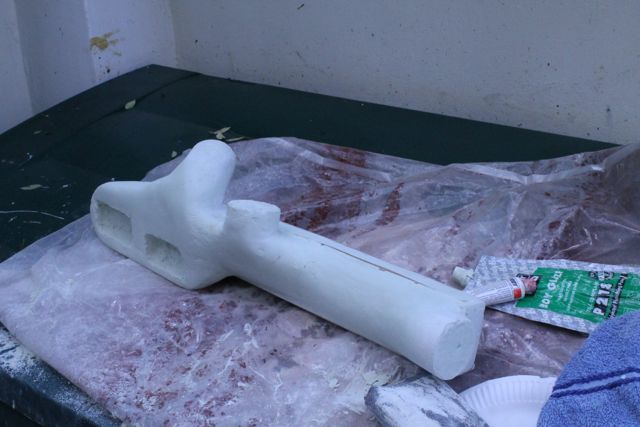
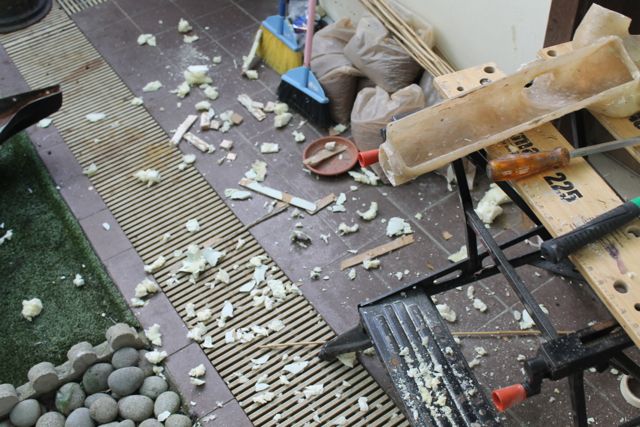
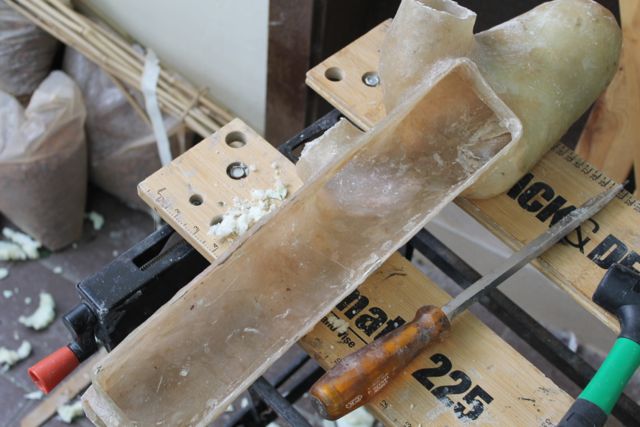
I applied mold release wax and 2 coats of PVA release agent, followed by fibreglass
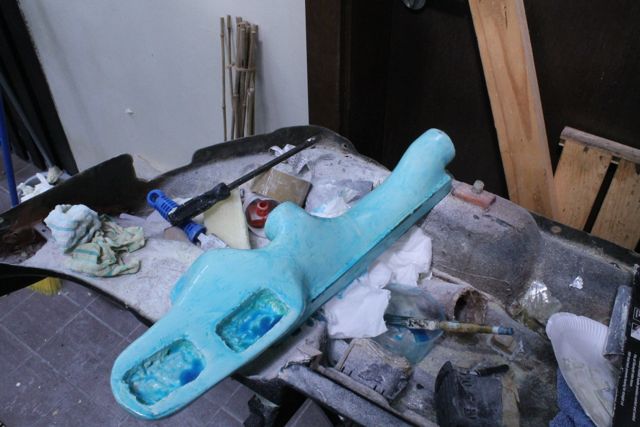
I left it for a couple of days (basically I was travelling so couldn’t do more) then started about the job of trimming and removing the foam and filler buck. Large rubber hammer, screwdrivers and wedges. It made quite a mess, but I was happy the wax and PVA did its job
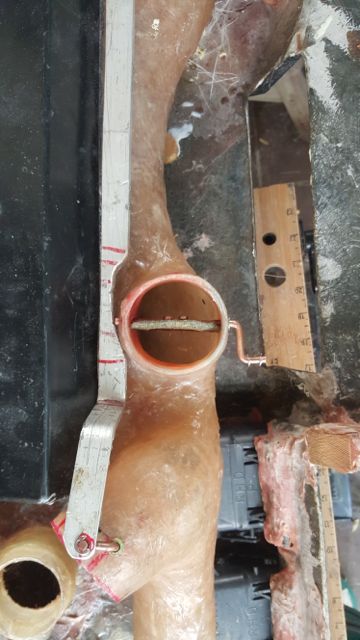
I started by making the control pivot arms for the flaps. They were made from some copper rod that I bent and beat flat with a hammer in the centre section so that I could screw them up to the flaps. I also used a dremel to grind out a channel at the end of the control arms to allow me to slip circlips on them to secure the control rod. I cut down a rivnut and slipped it on before beating the flat section. This then pushes into the fiberglass plenum chamber to secure the control arm and remove any play. Next I made up some flaps from fiberglass, they were cut to just a bit smaller than the air duct openings. I then cut and glued some felt around the edges so that when they were in the closed position the felt would provide a good seal and fill and deformities where the duct and flaps didn’t match exactly. I got the idea of using felt after pulling apart some production car HVAC systems and saw they did something similar. This also helps as the flap can sit at an angle and still seal the hole, reducing the overall distance the control arm needs to move to get it in the open position.
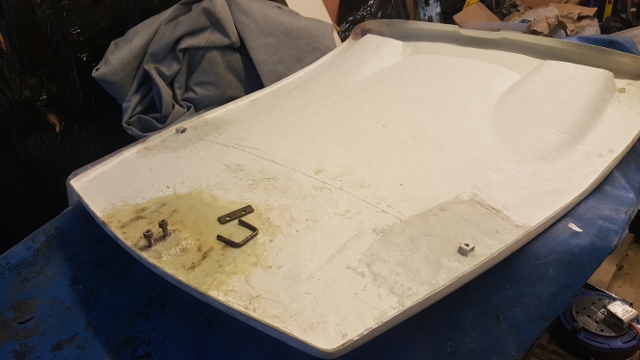
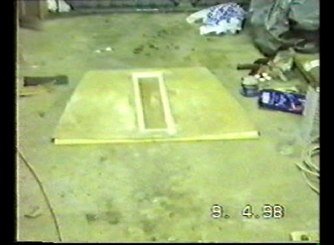
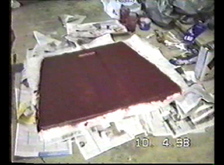
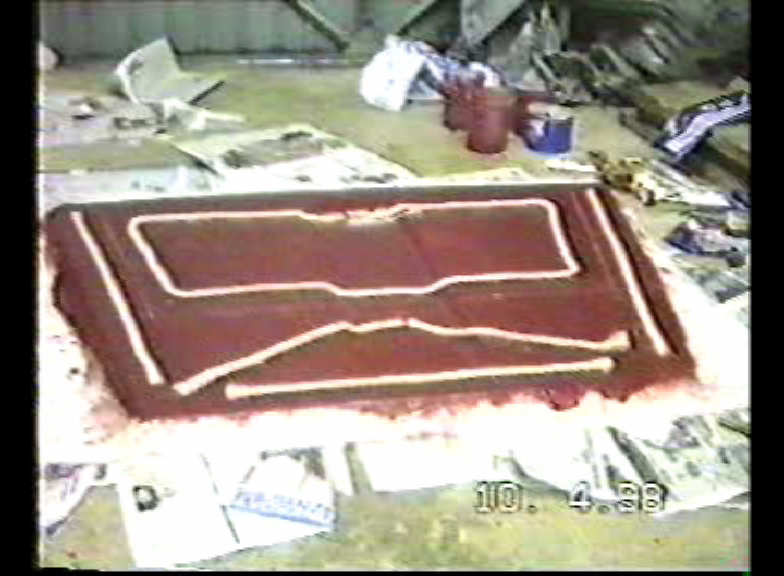
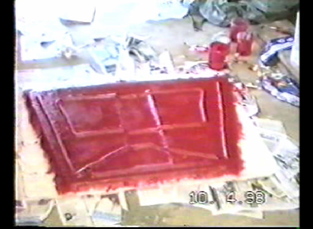
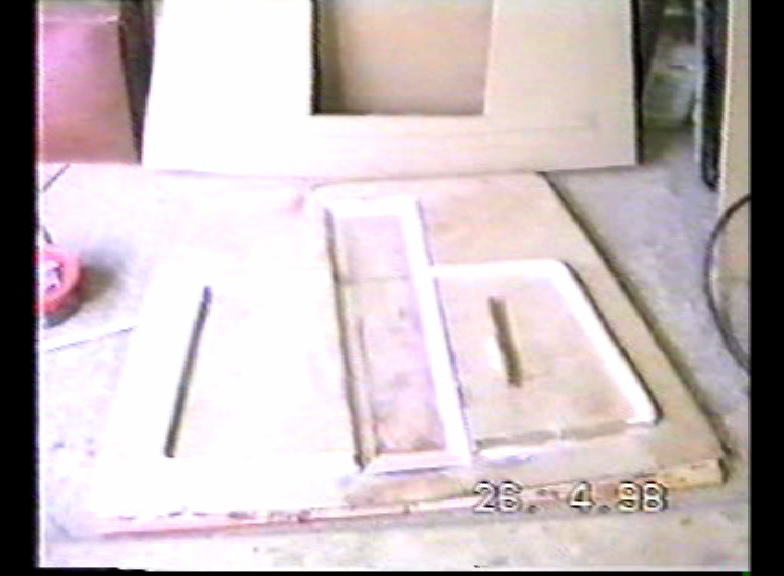
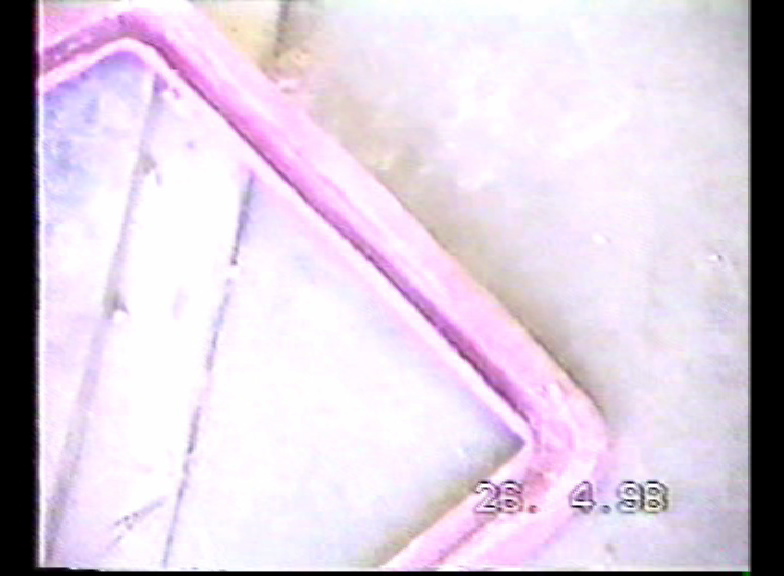
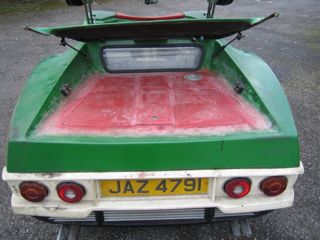
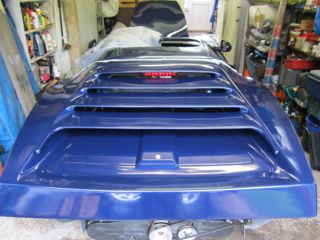
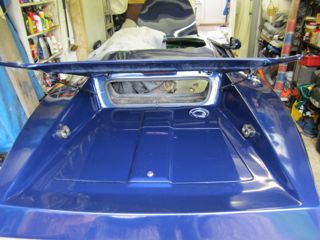
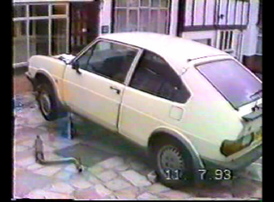
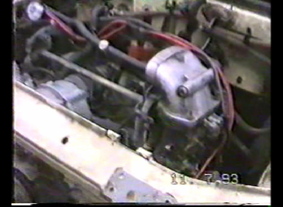
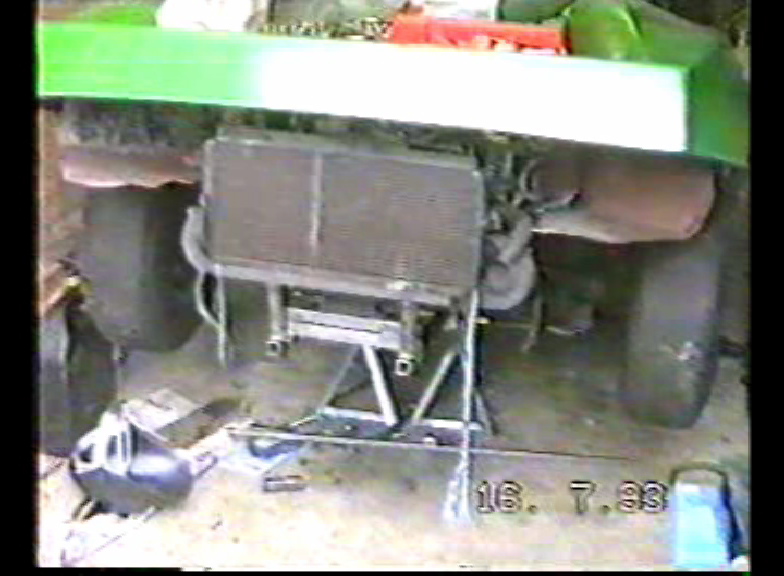
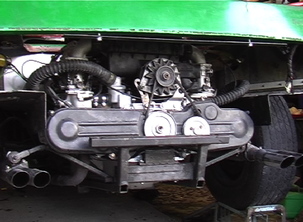
 Since I no longer had a VW engine and the Alfa unit was lower I didn't need the ugly engine cover I purchased. So I set about making a mold out of wood to replace it with a complete new full size cover and new engine lid. Most of the photos were extracted from old VHS tape so excuse the poor quality images.
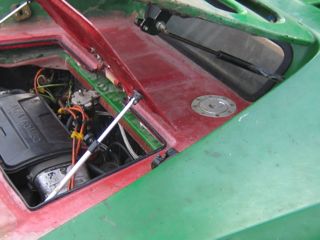
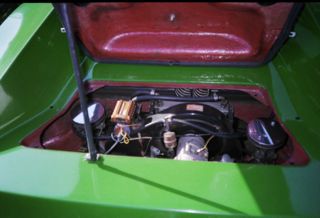
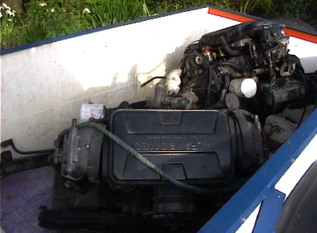
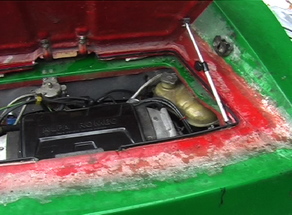
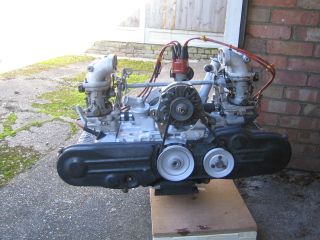
  When I first got my Nova it had a tuned 1.6 L Dual Carb VW Beetle Engine. It wasn't really designed for high revs and self destructed on the motorway when I pushed it a little too hard. I rebuilt it and only after a relatively short space of time I managed to repeat the incident and blew up my second beetle engine! It was after this I decided that a change was needed and started looking for alternatives. I was offered a 1.5TI Alfasud by a friend for nothing, it wasn't taxed and MOT'd and had sat in his garage for many years. So in the dead of night I drove it home, and by the next morning the engine was removed and ready to be placed in my Nova using a Kennedy Adapter plate to mate it to the beetle gearbox. After a couple of years I was offered two other engines, one Alfa 33 1.7L QV Cloverleaf and another Alfa 1.5L TI that had been tuned and used in rally cross. I opted to fit the 1.7L QV Cloverleaf. I ran this for a couple of years then took it out and sent it for a full rebuild. This is the same engine that is still in the car todat
|

David SkinnerI have been living in Singapore since 1998 and I only get to go back to the UK to work on my kit car once or twice a year, so as you can imagine progress has been slow. This blog chronicles the various jobs I do on the car each trip Archives
November 2018
Categories |


 RSS Feed
